
TONKA TINYS ADVENT CALENDAR
We were compensated for creating this Tonka Tinys Advent Calendar filled with Tonka toys. This post contains Amazon Affiliate Links. This means that if you click through and buy, I may earn a small commission.
Click here for our Toy Review Catalogue to read our reviews before you buy!
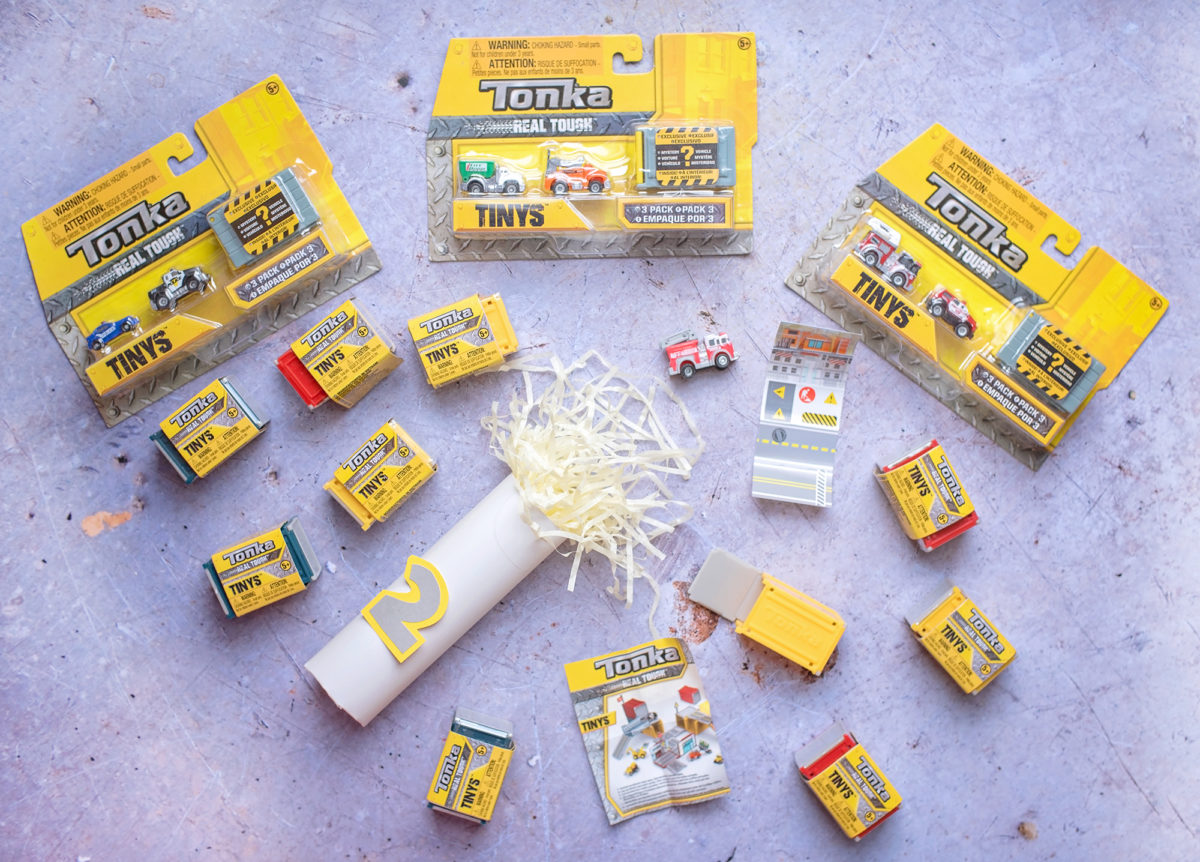
There are so many advent calendars on the market these days – Lego, Playmobil, Funko Pop… but what happens when you have a little Tonka fan in your house? You make your own calendar – and it’s really simple! Tonka Tiny toys are loved by the boys – the teeny little details, the working parts, the stackable interlocking garages they come with – and now they have stickers in them too – you can create a whole scene with them and I had no idea! They’re available as single blind boxes and in packs of three – where two are visible and one is a surprise! You can win one of these sets of three at the bottom of this post!
WHAT YOU NEED
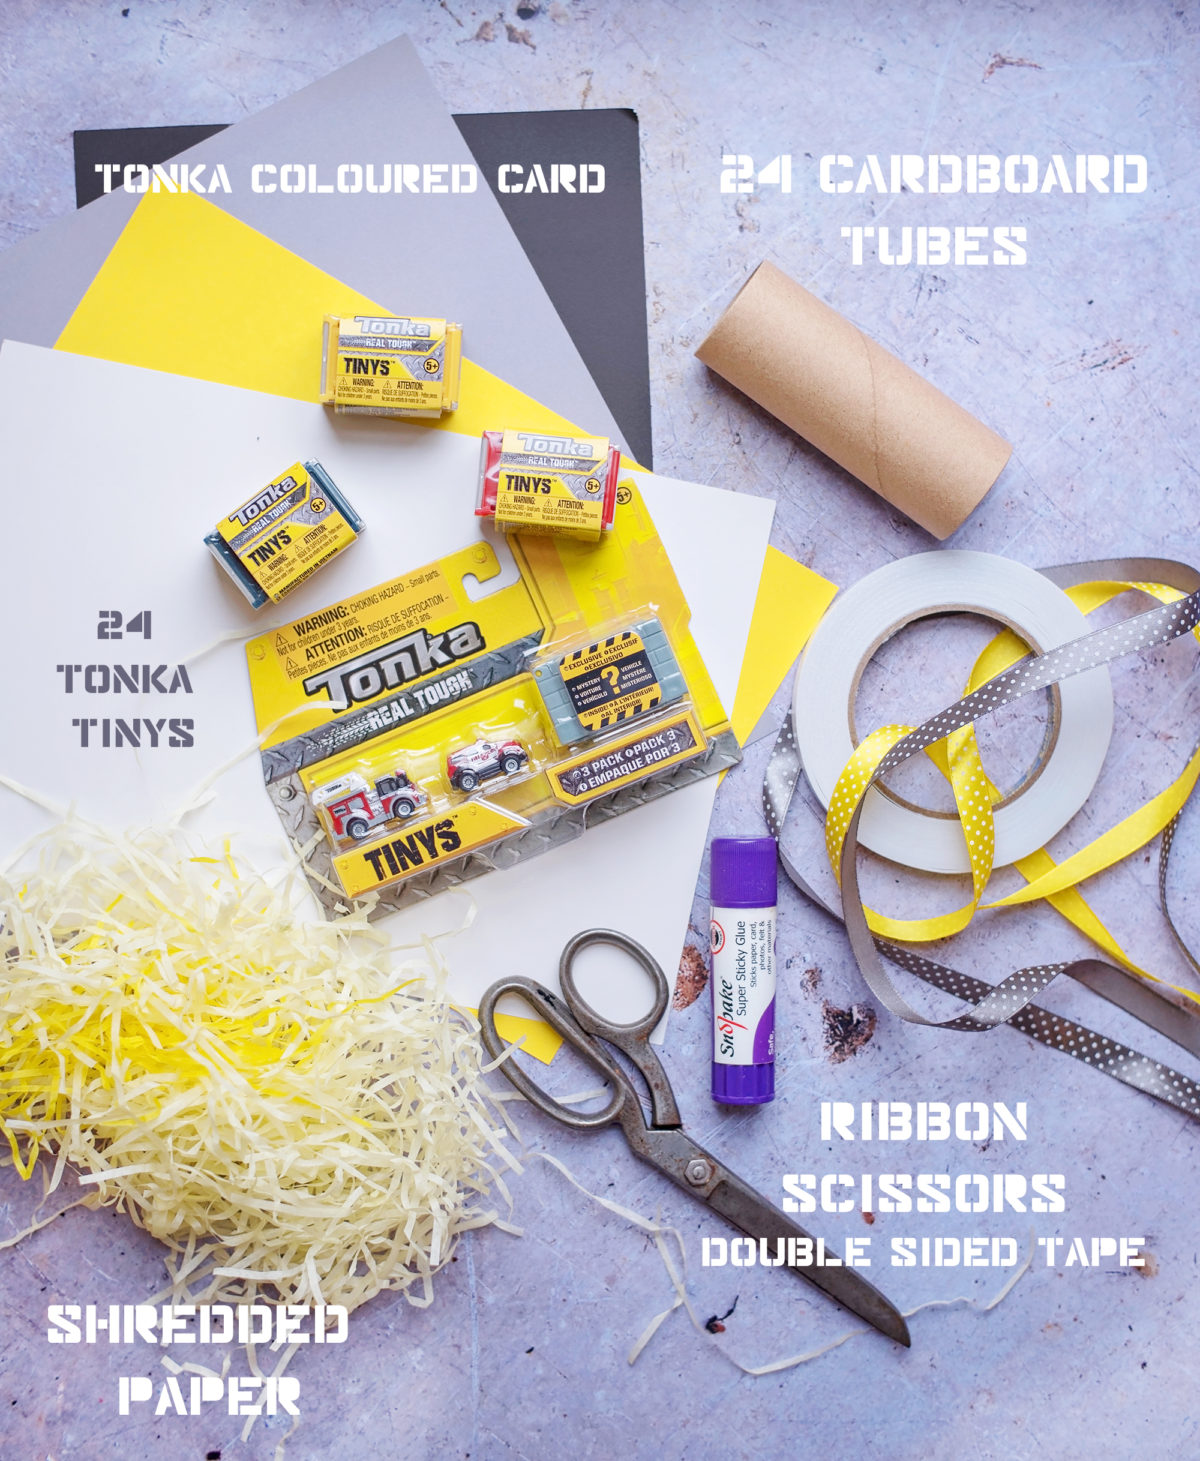
- 24 CARDBOARD TUBES
- SCISSORS
- DOUBLE SIDED TAPE
- COLOURED CARD
- 24 TONKA TINY GARAGES
- RIBBON
HOW TO MAKE A TONKA TINYS ADVENT CALENDAR
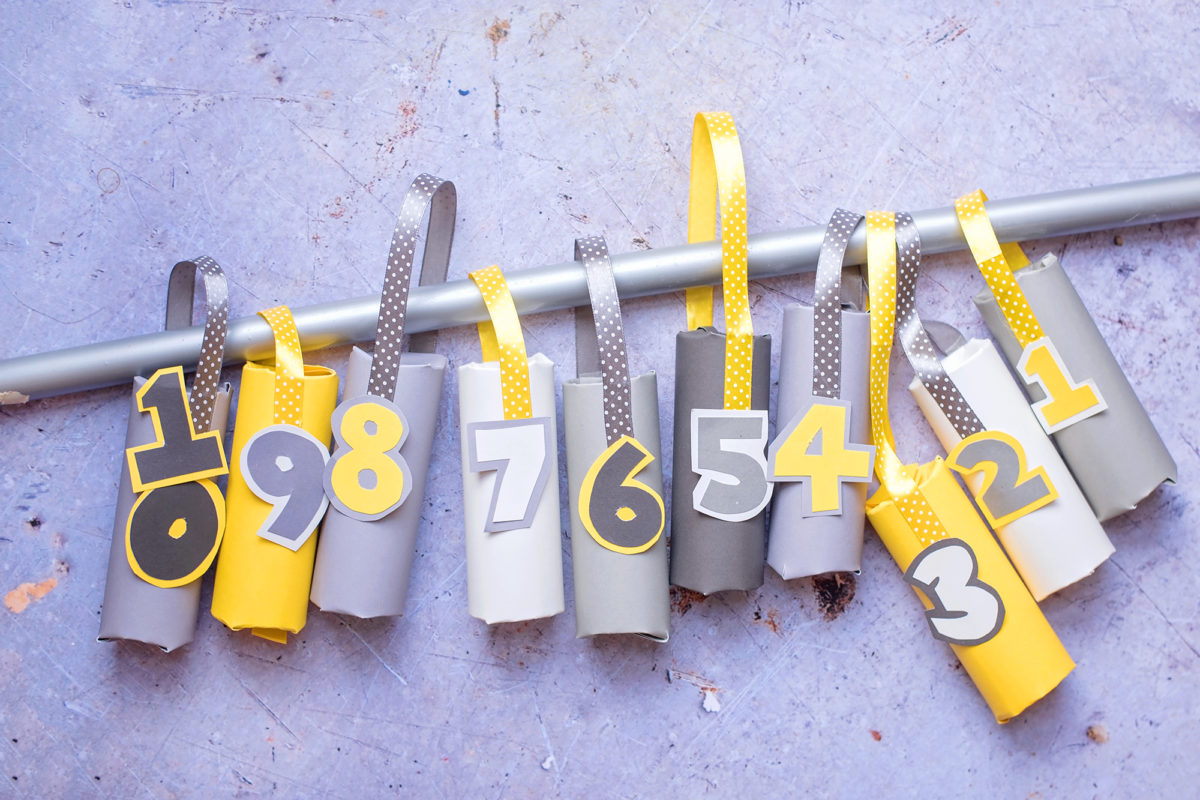
EASY DIY ADVENT CALENDAR

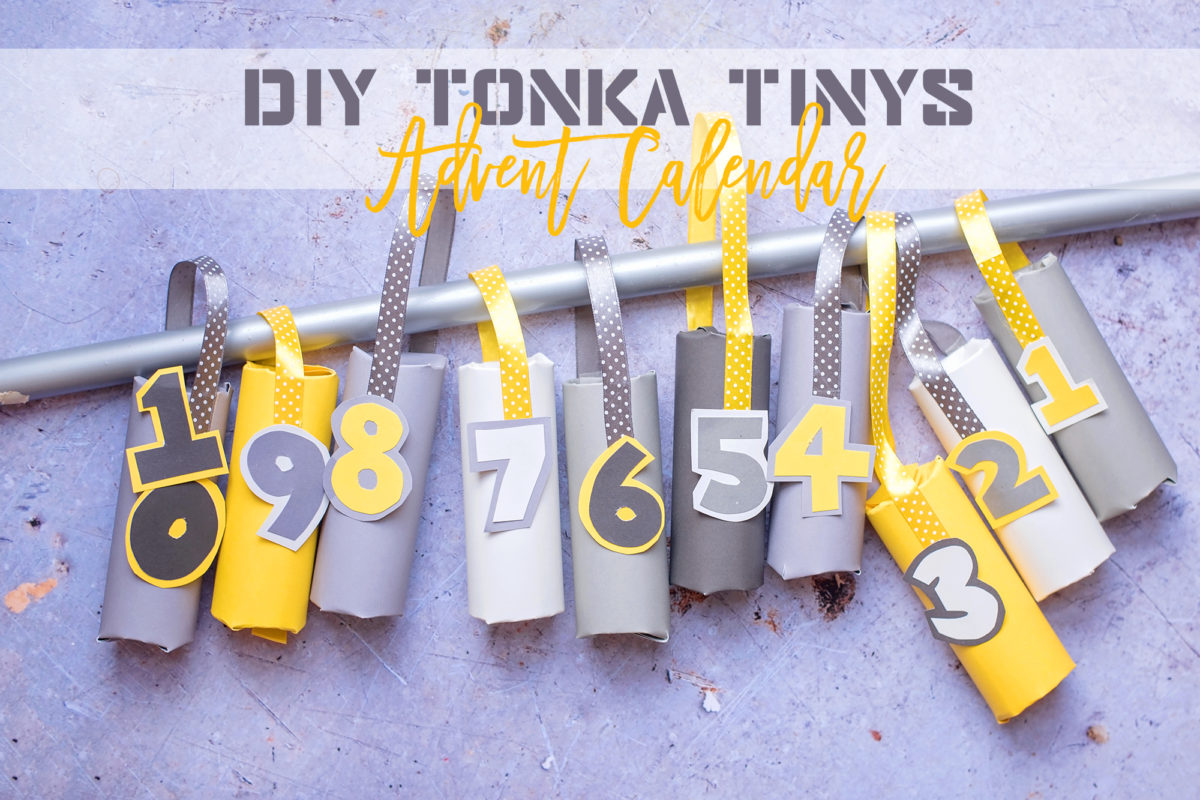
So this is what your calendar will look like when finished. We used a pole to hang ours from, but you can use a stick or anything you like – or pin them around your home to find! Here’s how to make this…
STEP ONE: CUT THE CARD

STEP ONE: So I used A4 Card, and placed it landscape. I wrapped the tube and cut the card to let it just overlap – probably about 2/3 of the card was needed.
I popped some double sided table on both sides of them tube themselves and also at the beginning of the card edge to seal it when wrapped. I removed the tape and starting at the untaped end of the card, I rolled them up and sealed them.
STEP TWO: SEAL AND CUT SLITS
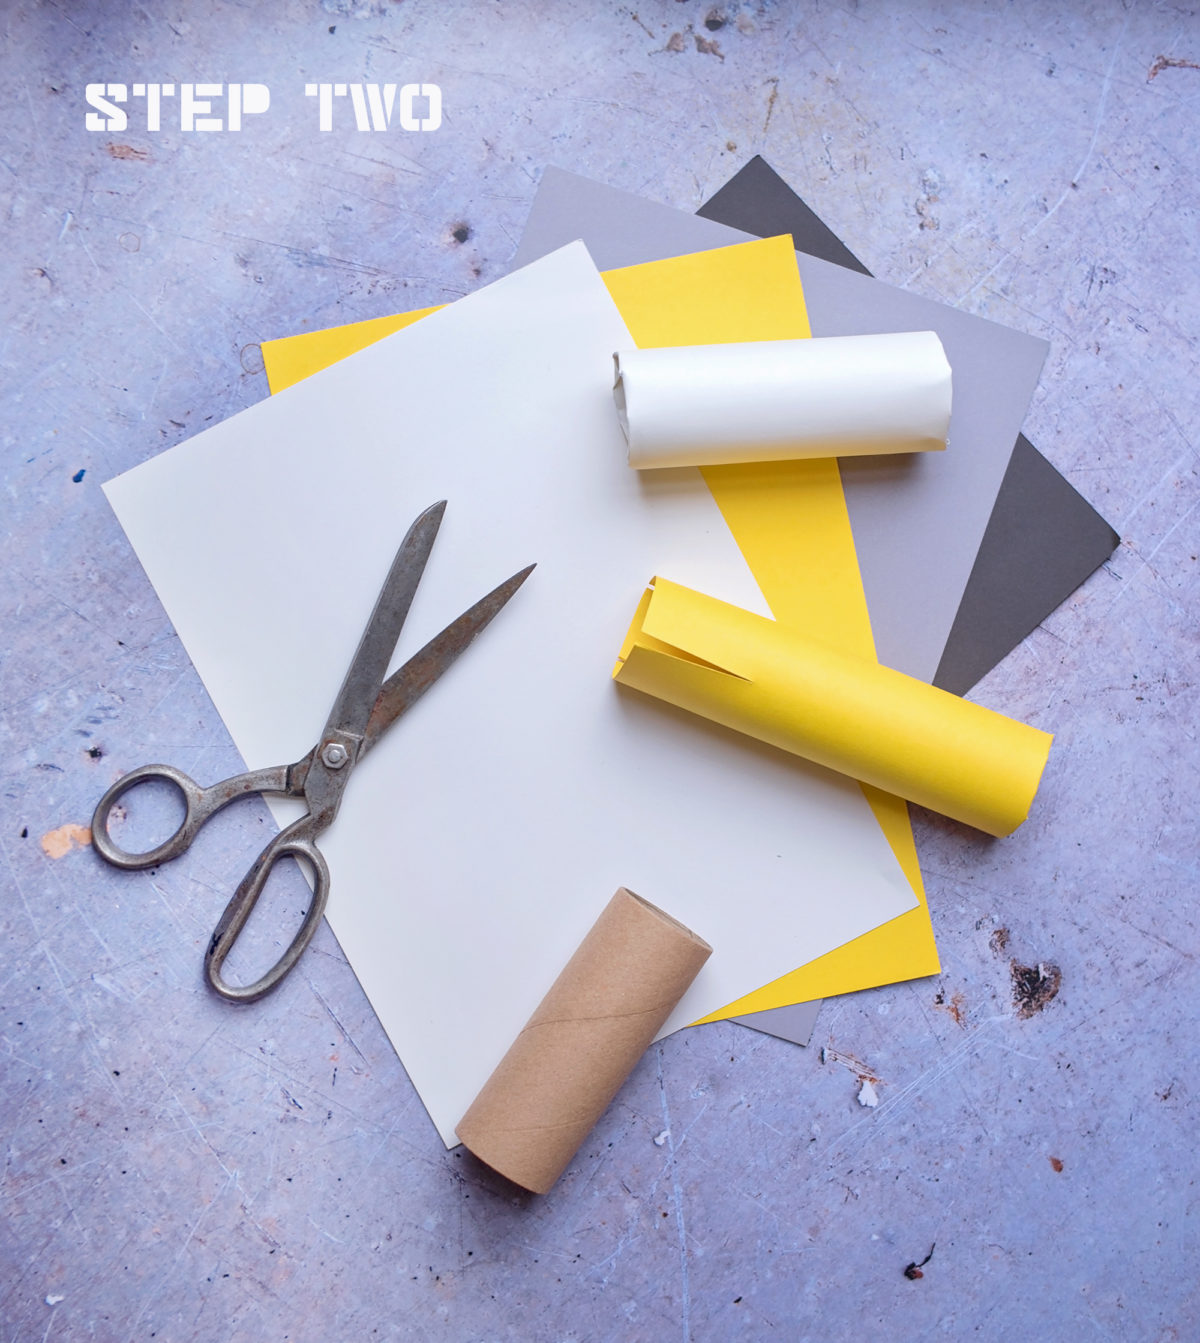
At each end of your tube there’s overhanging card. Make three little cuts in the cardboard on each end at equal intervals then fold and tuck the one end inwards. You can tape if you want to, but our card was thick enough to stay folded.
STEP THREE: CREATE THE NUMBERS
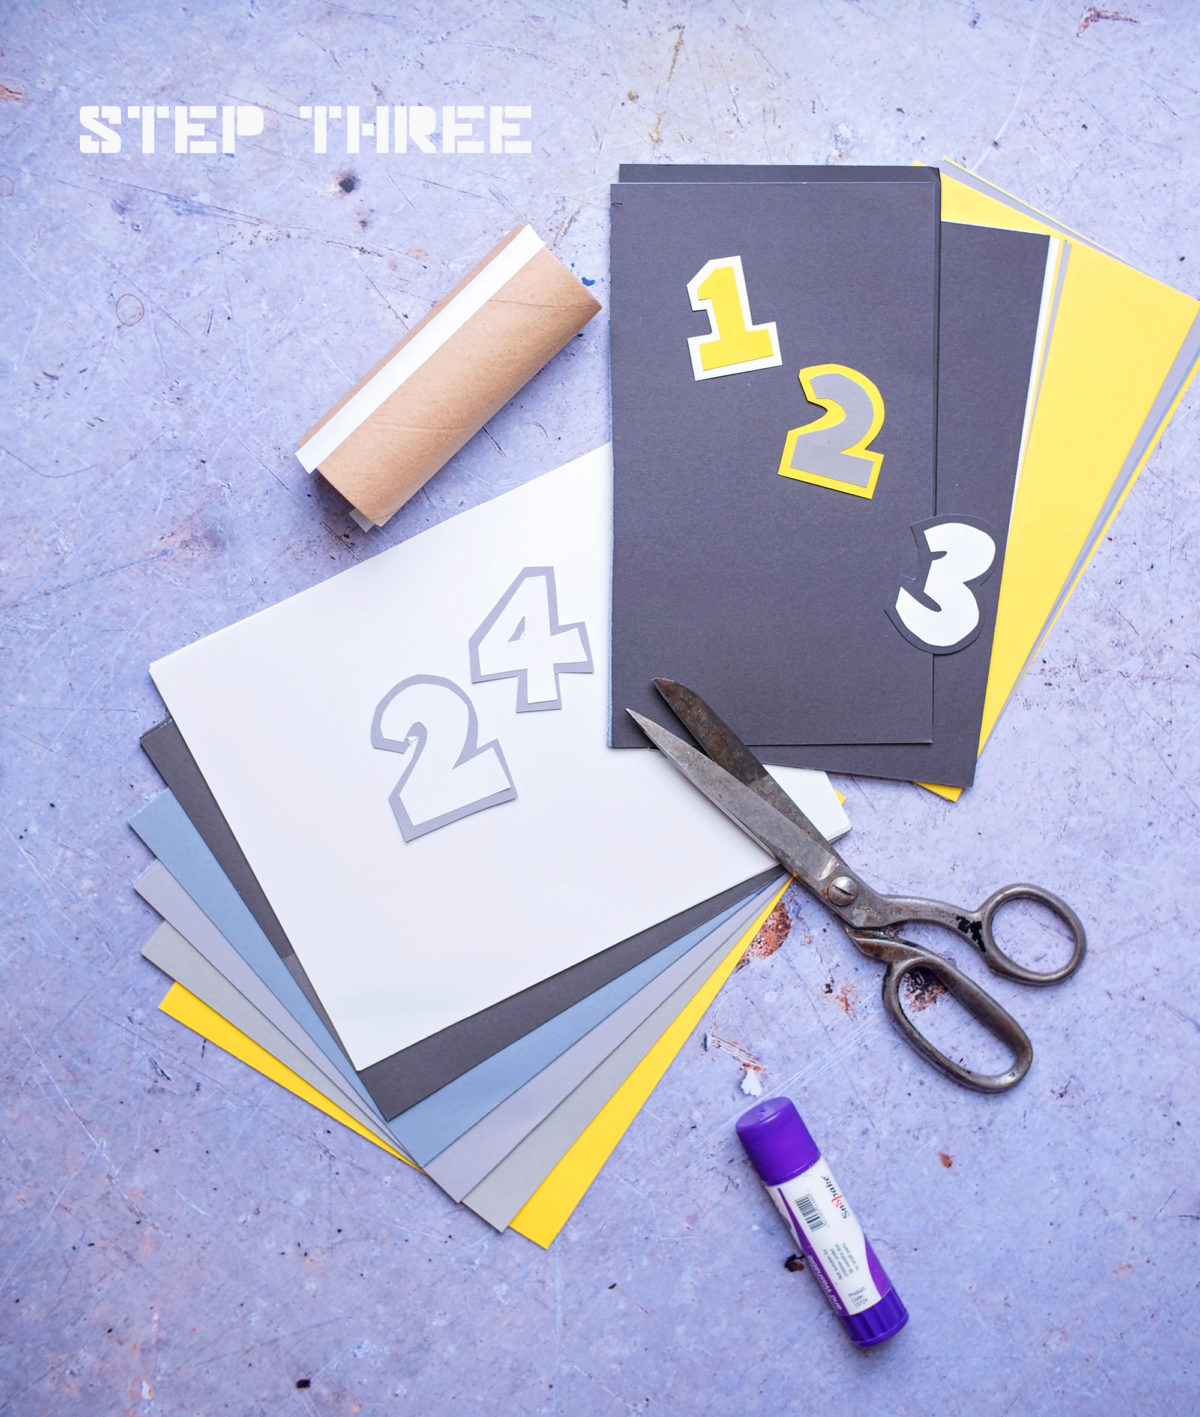
So I cut the numbers out freehand but you can use anything, there are so many pretty ones in the shops these days! I cut out numbers 1-24 on card and then cut shadow-like backgrounds for them too. We used Tonka brand colours but you can use any you like! I stuck the numbers to their backing with a glue stick.
STEP FOUR: FIX NUMBERS TO TUBES
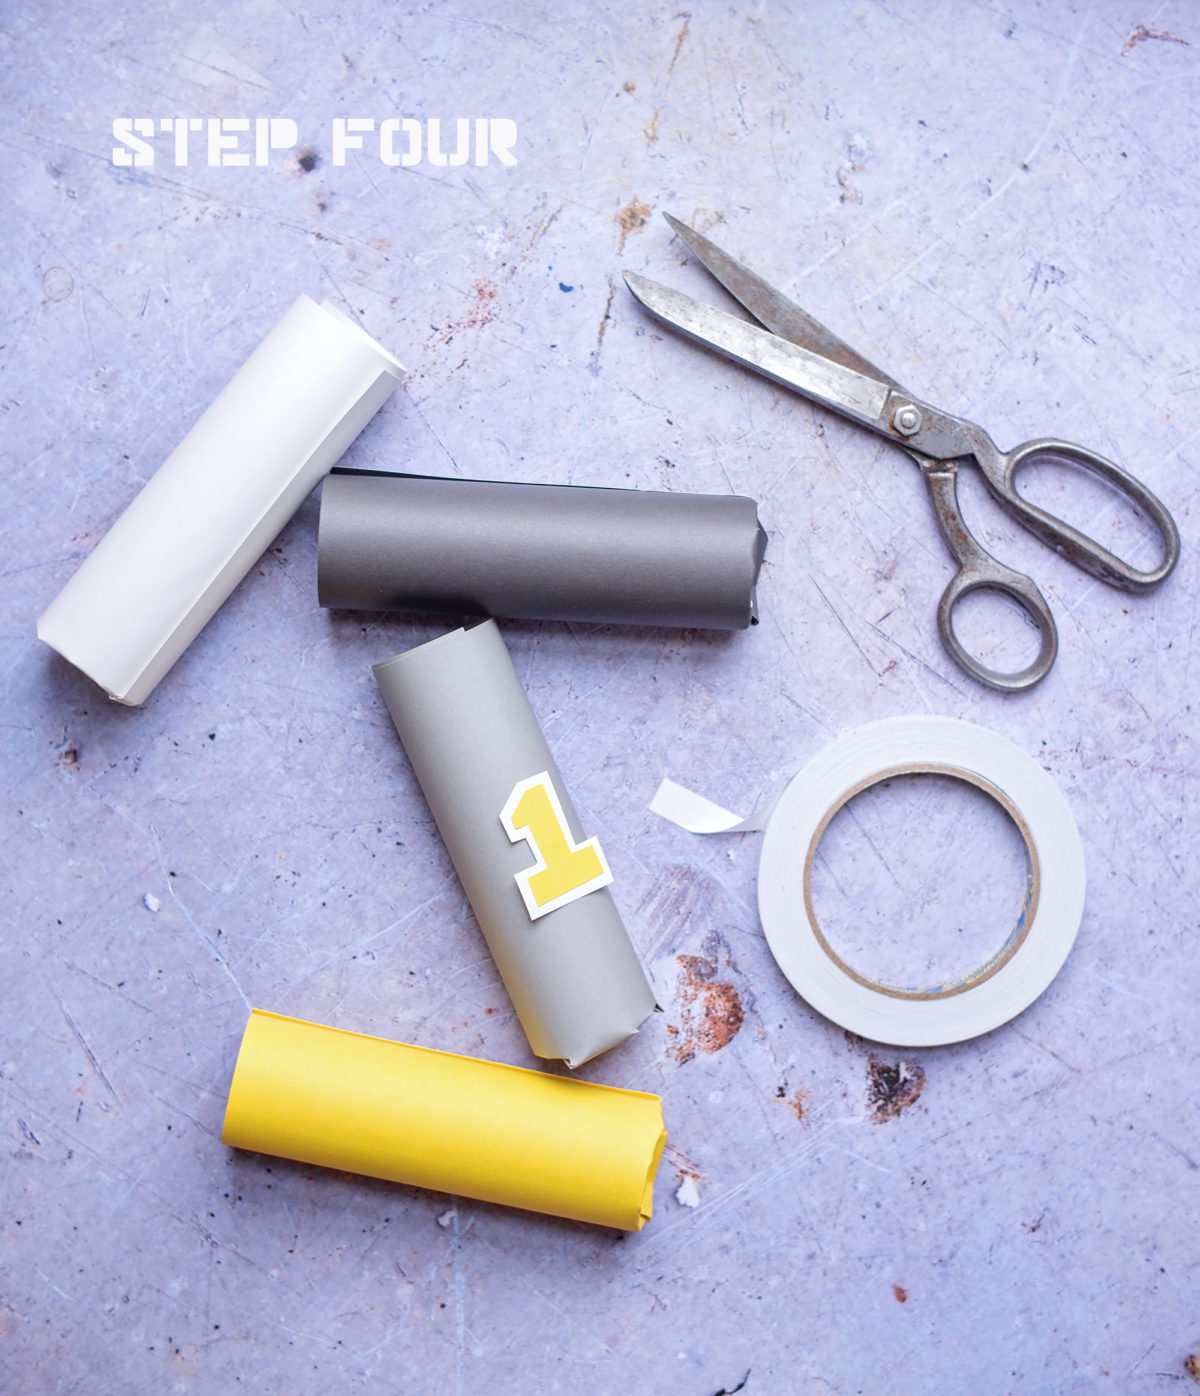
STEP FOUR: Fixing the numbers to the tubes sounds very simple, but as I had alternating/random colours to match the Tonka theme, it took me some juggling to get the colours all mixed and equal! I stuck them on with double sided tape.
STEP FIVE: QUALITY CHECK & TEA BREAK
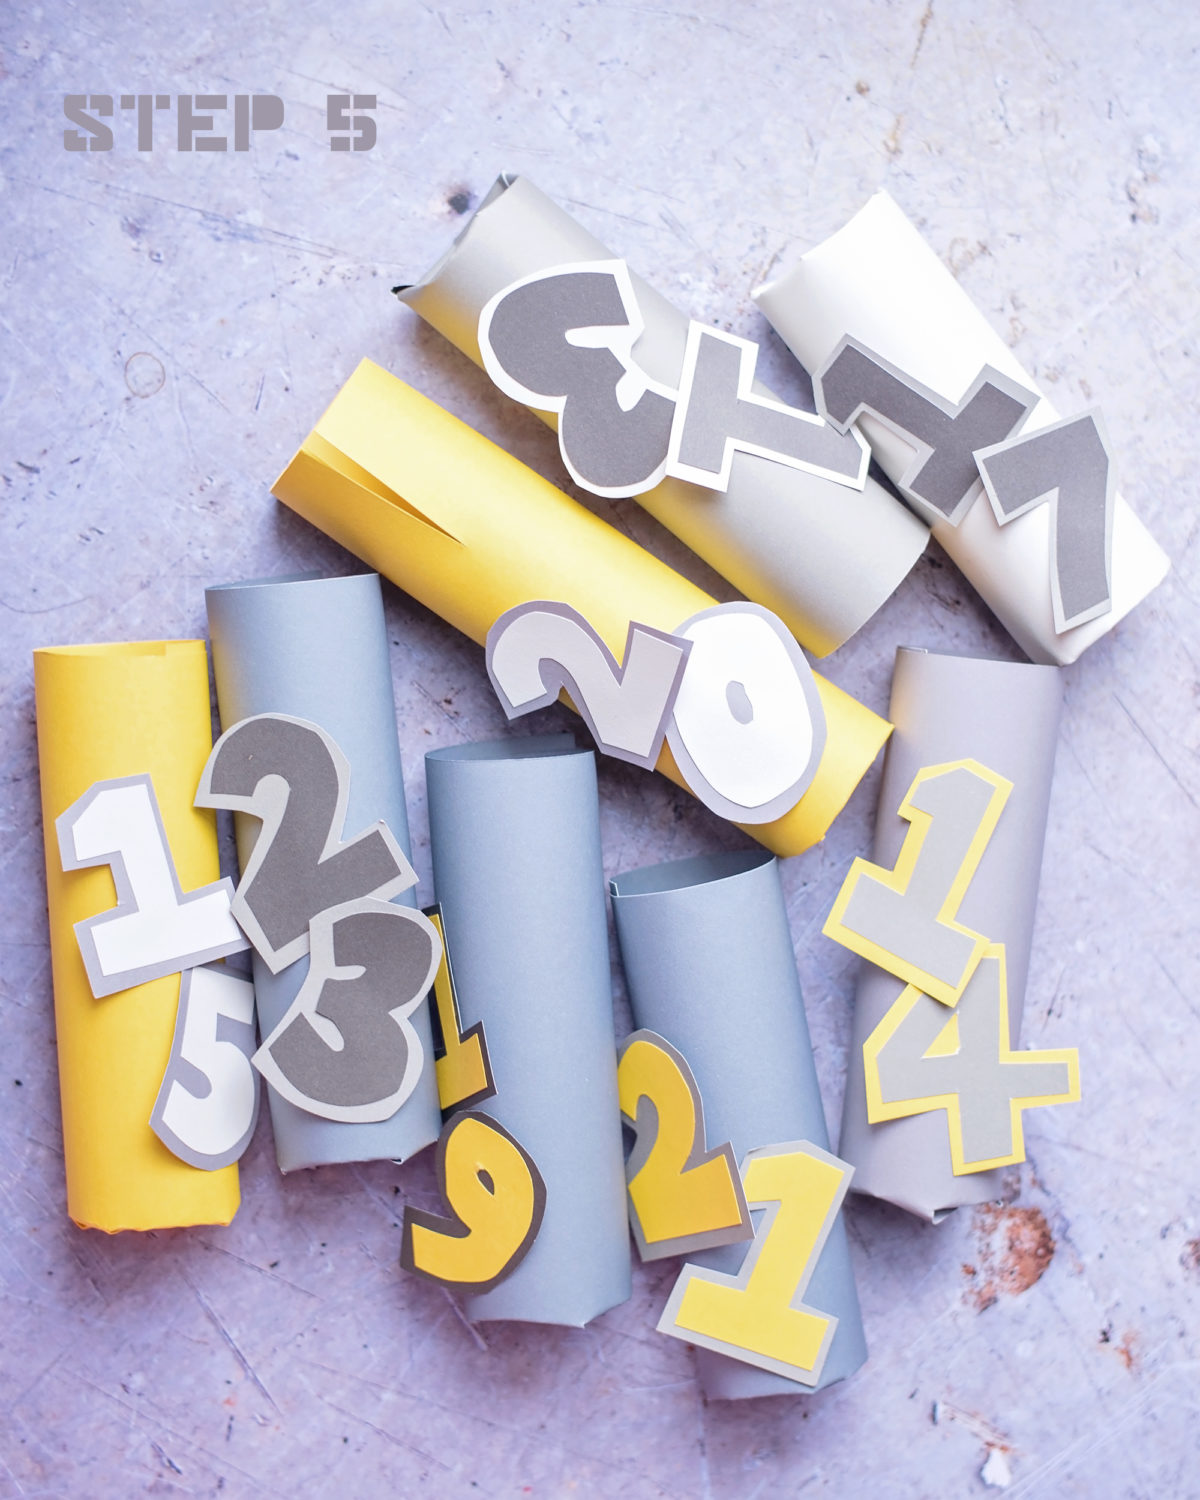
It might sound ridiculous but at this point I lined everything up and made sure my trucks were in order [sorry]. Everything stuck on, everything holding together and no numbers missed out. Have a cup of tea. And a biscuit – or a mince pie if you’re lucky enough to have had one already. You’re halfway there!
STEP SIX: FILL THE TONKA TINYS ADVENT CALENDAR TUBES
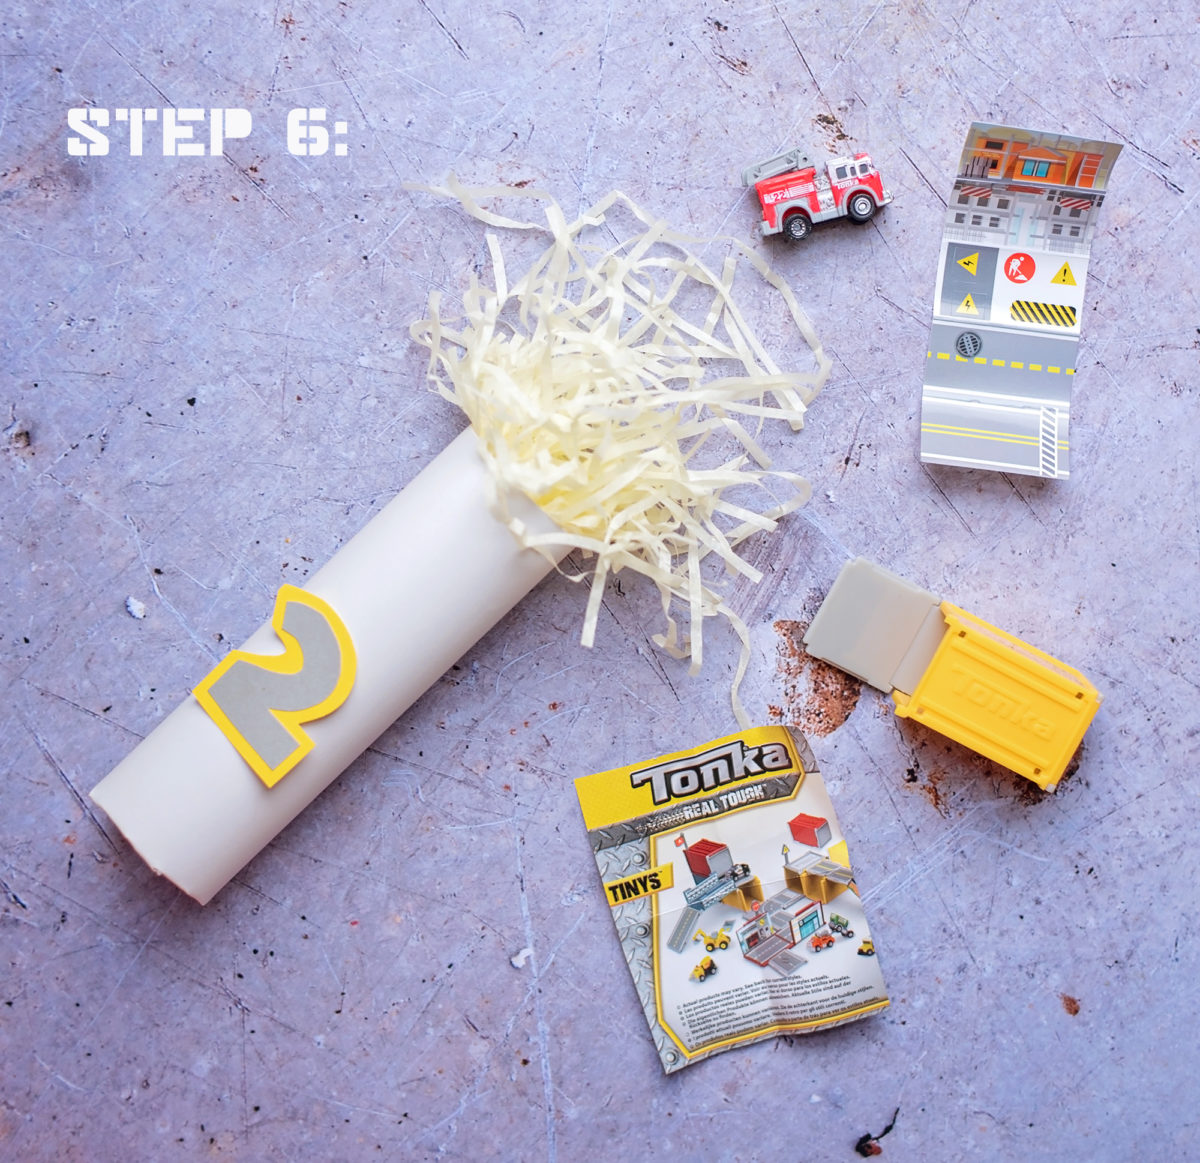
STEP SIX: Filling up the tubes was the most exciting part. Mostly because I got to see what was going into each tube! Inside Tonka Tinys are teeny versions of all kinds of amazing vehicles – and some stickers and bits too. The garages where they’re stored were too big for the advent tubes and so instead we decided to keep the garages empty and fill them as they’re revealed!
STEP SEVEN: HANGING THE RIBBON
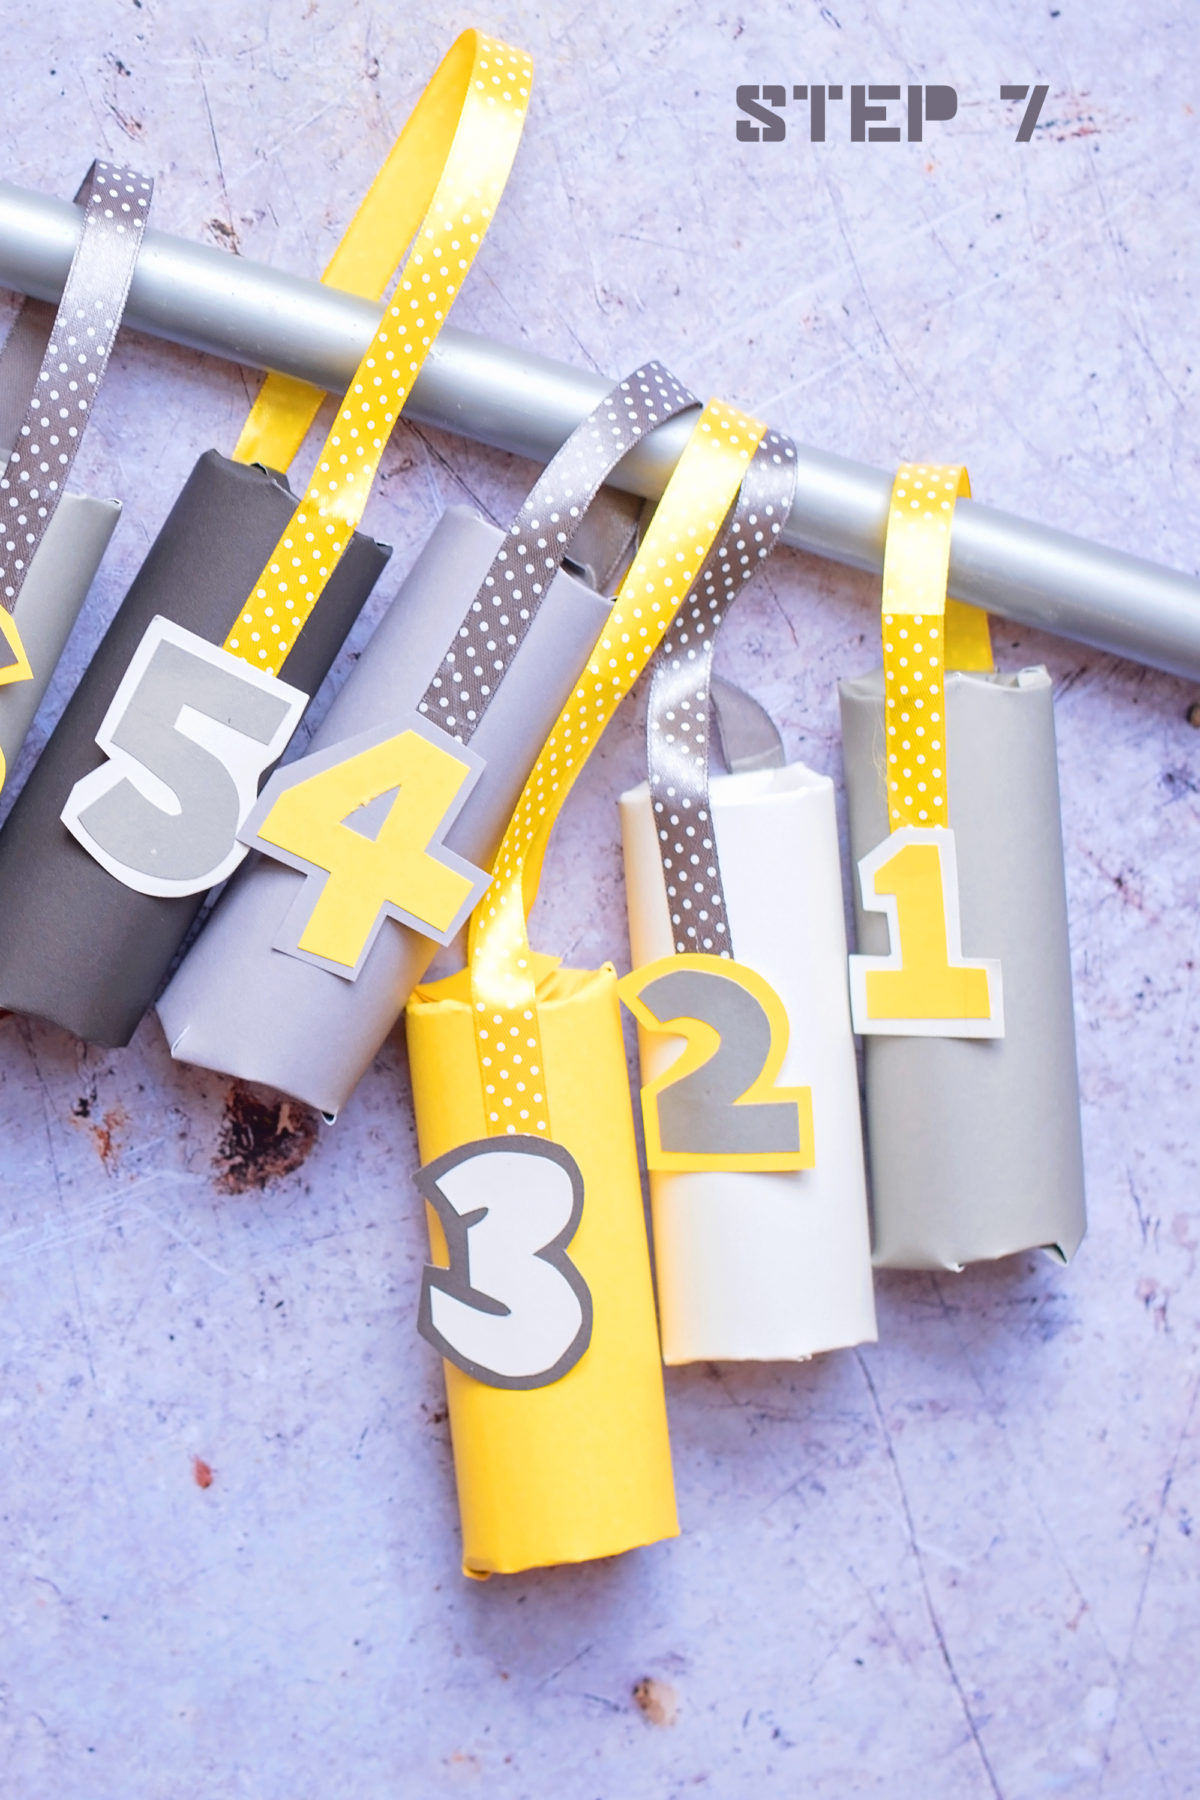
Our Tonka Tinys Advent Calendar is going to be hung up – and so we used an old metal broom handle for ours to keep it construction like! We cut ribbons at different lengths in grey and yellow and alternated these for each number advent tube. We hung them going from left to right 1-24, so think about the order you want to see them in when you’re putting them on!
STEP EIGHT: THE REVEAL!
Step Eight: Finally you’re done! I’ve hidden mine from the boys because from December 1st, they’ll be opening it and you can see what we find on Our instagram stories! Follow us, @KeepUpWithTheJonesFamily for more fun and competitions on the lead up to the big day!
![TONKA TOUGH? THE TONKA DIE CAST RANGE [#TESTDRIVETUESDAY]](https://keep-up-with-the-jones-family.com/wp-content/uploads/2018/06/Tonkadiecast003.jpg)

![OOOH LA LUNCH – CAFE ROUGE [REVIEW]](https://keep-up-with-the-jones-family.com/wp-content/uploads/2015/08/caferougeentrancesign.jpg)
A sparkling wine Advent calendar!
love these little tonka tinies – and so perfect for advent calenders and stockings!
Thanks for the competition
My favourite calendar would be a slipper sock one!
Jo Malone Advent Calendar.
I would like to make one like Tonka but filled with my favourite Celebrations
I’d love an advent calendar of herbs and spices – it would be a great excuse to experiment with some new recipes.
right now any, because I cant, afford to get myself one this year this is a great idea!
I’d like a Tonka one because my grandson is car mad.
something like this one you have made
My boyfriend got me a vegan chocolate calendar this year and I am really excited about it!
A scented candle Advent calendar.
I like the traditional ones with Christmassy pictures.
I’d love a really induglent beauty advent calendar. One day!
A G&T Advent would be great!!
Anything with choccy choc in is a winner for me!
Love this. We are a home ed family and the creative ideas are much appreciated.
Claire.x
Mine would be a baileys advent with all the varieties in bottles and chocolates
My favourite advent calendar would be full of lip balms as my four granddaughters are always snaffling mine
A Dior advent calendar but they are over £300 which is just crazy!!!
A dior advent calender, but like most of the top brands they are silly money
I really want a cheese one!
Turkish Delight!
Marzipan chocolate
I’d love an advent calendar of books! I just love reading and I’ve seen where parents will do them for children but I would love to have one as an adult.
A gin one!
A Lindt one!! Love Lindt chocolate, I did love my Soap and Glory one last year though
i would love a calendar that every day you get a new mini wish 🙂 failing getting a Jeanie filled one a lindt chocie one is lovely
A hotel chocolate if we are talking chocolate, or my friends mum used to make one from samples she collected through the year with little perfumes,soaps and creams It was so good and I was so jealous. ideal for the teenager.
Anything to do with bath goodies would suit me
would love a spice advent calender
It would be a candle one for me! Love having a new candle to burn each day.
I would love a yarn advent calendar
I would love a really expensive chocolate advent calendar
A traditional chocolate one, all for me.
If I were to make up an advent calendar my favourite one would be a robot that does a new house chore for me every day! But I do love the look of the soap and glory beauty advent calendars
A lovely perfume one
Definitely a chocolate one my perfect one would be monty bojangles I was going to buy one but stopped myself lol
One with aromatherapy oils would be lovely
I would love a perfume one
Biscuit Advert Calendar.
Tiny items for my dolls house!
A praline chocolate calendar
I’d love an advent calendar filled with dark chocolate truffles
I like one with Gin in
Perfume one 🙂