The Ultimate Guide to Dyeing Your Easter Eggs
Hey, Friends! You read that right, this is *the* ULTIMATE guide to dyeing your easter eggs. Not average, not pretty good, but the best. haha. Easter is around the corner and so for those of you who have always wanted to try and make pretty coloured eggs for your display or for Easter breakfast, brunch or lunch [or dinner, no judging here!] this is for you. It is SO easy – everything you need to know is right here.
I’ve been dying and decorating eggs since I first saw Steel Magnolias [my favourite film]. Truvy [Dolly Parton] had a car boot full of them ready for the Easter hunt and as soon as I saw them, I knew I had to make them part of my Easter traditions.
Why Do People Dye Eggs at Easter?
There’s no definitive answer to exactly when the tradition took hold, as people dyed or decorated them – but so many countries and cultures do! People have been dyeing eggs since way back when! Eggs are a traditional sign of new life and rebirth all over the world. They were coloured red by Christians to represent the blood of Christ and known as Paschal eggs, given as gifts at Eastertide. English history books also tell us that way back in the 13th century, in 1290, King Edward I ordered 450 eggs to be coloured and decorated with gold leaf as gifts for his family. if they’re good enough for Royalty, they’re certainly good enough for us, so let’s get to it.
What Kind of Eggs Should I buy to Dye for Easter?
You can of course dye any eggs to a degree. However, white eggs are obviously the most easy to colour – and the easiest to predict the end result with too. The difference is more dramatic than with our brown eggs and so we use them. Also for some reason my boys are more suspicious of white eggs and eat the brown ones first.
The eggs in this photo are duck eggs – their shells are prettier and more porcelain like in their finish if you’re after a more ornamental egg.
Regular white chicken eggs are available in more and more supermarkets now – Marks and Spencer has them, as does Waitrose and I found some in ASDA last week too. If you know a farmer or neighbour who has chickens that produce white eggs, like the White Leghorn, make friends fast. haha.
Do I Need to Hollow My Eggs Before Dyeing?
It’s up to you whether you do or not. If you’re planning on using them as a hanging decoration in an Easter tree, then yes, but if you’re going to enjoy them for lunch afterwards or you’re using them for an Easter Egg hunt then hard boiled is the way to go. The same goes for if you’re handing them to toddlers to decorate afterwards. No one wants tears over crushed eggshells.
How Do You Hollow an Egg?
Hollowing an egg is simple but can get a bit messy if you’re not prepared. You’ll need a thin piece of wood or metal, like a skewer, and something to pierce the top and tail of the egg. Wash the eggs before use, then pop a hole in each end about 2mm wide [or the diameter of your skewer] and insert the piece carefully so as not to crack the egg. Then scramble the yolk carefully to break it up. Place your mouth over the top hole and blow like there’s no tomorrow. You may need to repeat the scrambling process a few times to get it all out. When it’s empty, rinse through with water and let them dry.
How to Submerge The Eggs to Dye Them
If you’re planning on eating the eggs, pop them in some cold water first and see if they sink or not. If they float, they’re likely to be older eggs and you probably don’t want to be enjoying them on Easter Sunday. Fresh eggs sink, so you can boil and dye them easily, if you’re leaving them whole and solid. If you’re blowing your eggs and will have hollow shells, you can keep them submerged in a few ways. Use a pencil or skewer….or you can use the method we did when our middle son was a toddler and desperately wanted to join in. We got the mason type kilner jars from IKEA that are SOLID, and used them. Sealed the top and let him shake the jars to his heart’s content.
Instructions for Dyeing Easter Eggs
You will need:
- Eggs [White are easiest]
- Food colouring
- White vinegar [this helps the dye be absorbed by, and stick to, the eggs] You can use lemon juice if you can’t stand the smell!
- Hot Water
- Paper Towels
- Slotted Spoon or Egg Spoon, or Egg Tongs.
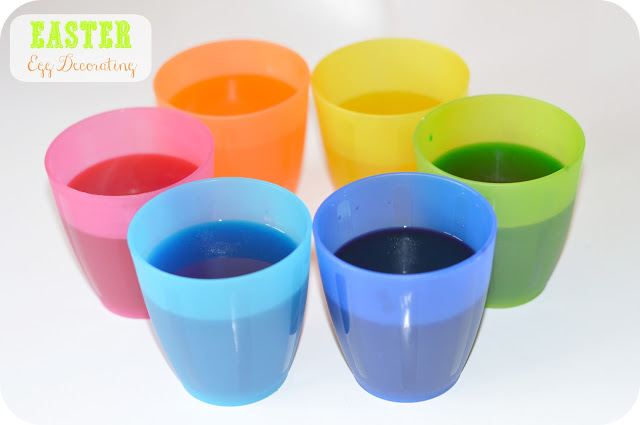
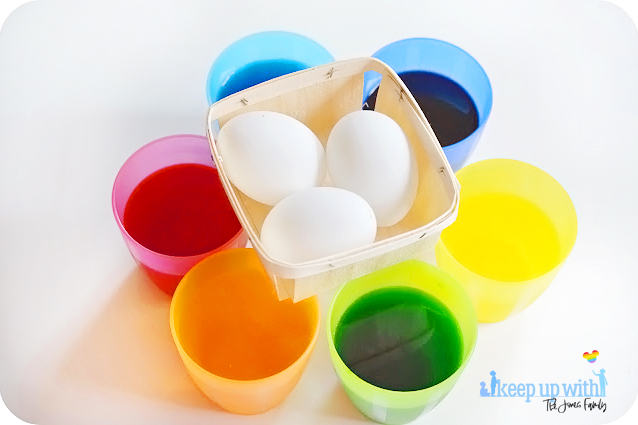
- One bowl for each egg you’d like to colour differently. We use cups or the IKEA Kilner/Mason type ones. These are brilliant if your children want to be involved as there’s then no risk of them knocking over the containers and spilling them.
How to Dye Eggs with Food Colouring
Each egg colouring station typically uses around 20-25 drops of food colouring and two teaspoons of white vinegar.
The Best Way to Dye Eggs for Easter
As I always say – and this is from experience, hahaha – prepare your area. You’re going to be using food colouring and whether you like it or not, it’s going to get somewhere you don’t want it. So cover the surfaces and make sure you’re wearing an apron or old clothes.
Boil your eggs carefully to avoid cracking them, and wait for them to cool. Let them cool completely. You can run them under the cold tap to help hasten this along.
Once your eggs have cooled, boil some water. I find that everything works easier and faster with warm water. Mix the water in each bowl with the 20-25 drops of food colouring and white vinegar and mix in. Make sure you have enough water in each colour station to cover the eggs completely.
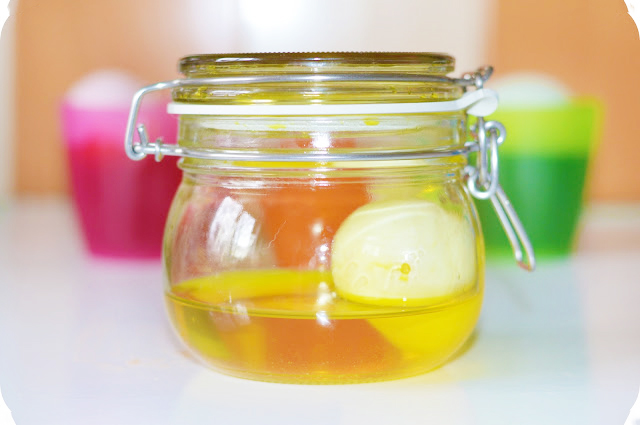
Eggs need to be submerged for them to dye properly, for obvious reasons. The photo below shows what happens when you don’t sink them under the food colouring. haha.
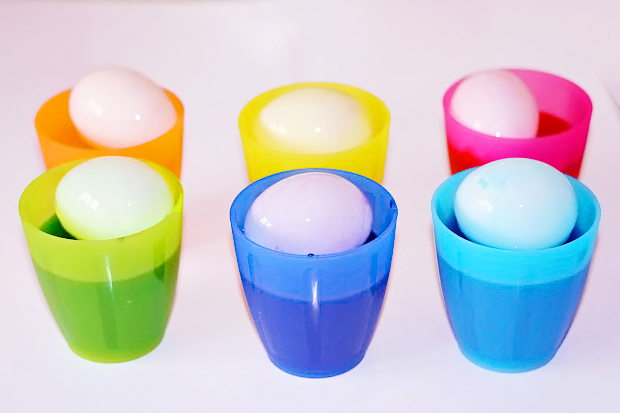
Lower the eggs into the water using your spoon. I use the slotted one or one with fingers because they both drain the water easily and I don’t end up with drips everywhere or having to get my fingers coloured.
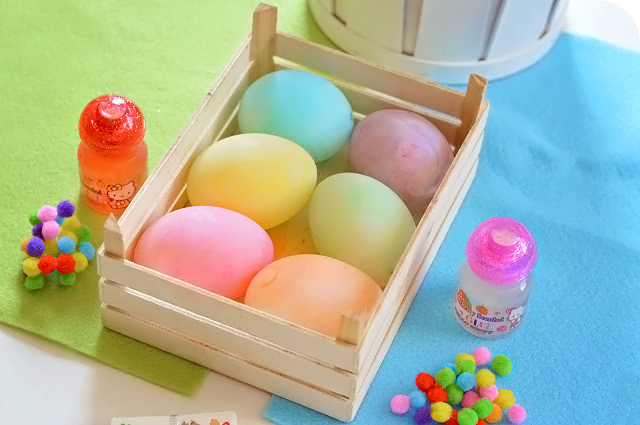
Leave the eggs for five minutes for a good colour, or longer for a deeper, richer colour.
Remove your eggs carefully to avoid dripping food colouring everywhere, and place on the paper towels to dry. Resist the urge to pat them dry, just leave them to air dry or you’ll have patchy coloured eggs.
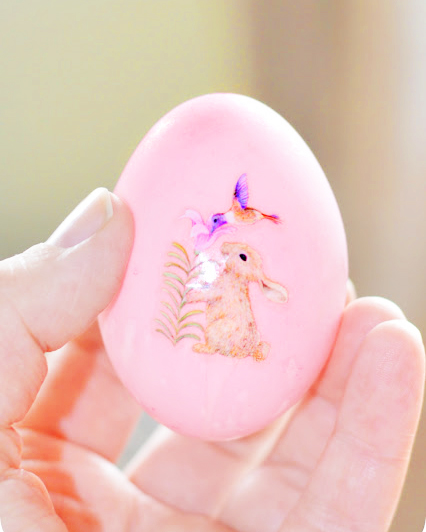
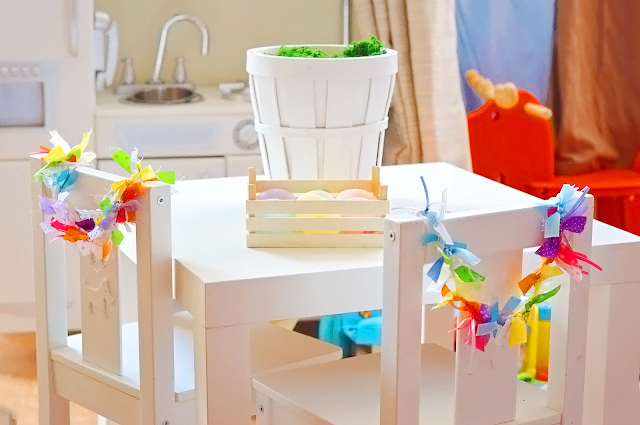
Display or decorate for Easter! We like to put stickers on ours!