
PARTY DECORATION TUTORIALS: BEAUTIFUL ON A BUDGET
This shop has been compensated by #CollectiveBias, Inc. and its advertiser. All opinions are my own alone.

First there was bunting.
And now? It’s a party-popper littered minefield. Die-cut cake bunting, garlands of perfumed pom poms, metallic and sorbet hued tissue paper fans and rainbow confetti stuffed balloons. There are customised, hand-embellished cupcake toppers and glitter-dipped, stand alone letters spelling messages of love and celebration… and I love it.
The simple tradition of party decoration has evolved from a handful of primary coloured balloons and supermarket paper plates into a perfection obsessed effort to take guests’ breath away – and it’s largely thanks to us mommas on party-planning highs as we scour and compare the ideas on Pinterest with the bespoke creations on Etsy. We want our little ones’ day to be picture perfect. Sure, there are people who don’t feel the same way as we do – and that’s fine – but I know there are more like me out there, just itching to start sketching out hopeful table plans as soon as a birthday is on the family horizon.
As beautiful as the Etsy creations are, before I we know it, I’ve we’ve spent over £50 decorating a buffet table and I’m, we’re trying to figure out how to explain this to our husbands who have begged us, much like Steve Martin in Father of the Bride, to keep it under control. Much as we’d like to, we just can’t. Or I can’t. And often don’t.
So, as our Baby Hero turns one this July, I thought I would try and restrain myself host a party the old fashioned way – DIY style. I’m going to show you how I’ve crafted my way to a pretty and effective birthday party table on a low budget. It might not be the lowest budget, and if you can go lower, please tell me how – and Martha Stewart probably won’t begin following you on Instagram afterwards – but I can promise it will be way under the Etsy price tag, you won’t have to pay postage, and you’ll feel very pleased with yourself when people compliment you on your efforts.
Today we’re making:
1. Cake Bunting
2. Glitter Painted Stand Alone Letters
3. Cupcake Toppers
4. Tissue Paper Tassel Garlands/Balloon Tassels
I’ll be making a little video for each of these and detailing them step by step for you all to check you’re on the right path. If you have any problems, please feel free to comment below and I promise to get back to you!
I bought my supplies from our only crafting store for miles [Hobbycraft] because I knew I could get everything under one roof – except for the items where I note their origins in the description.
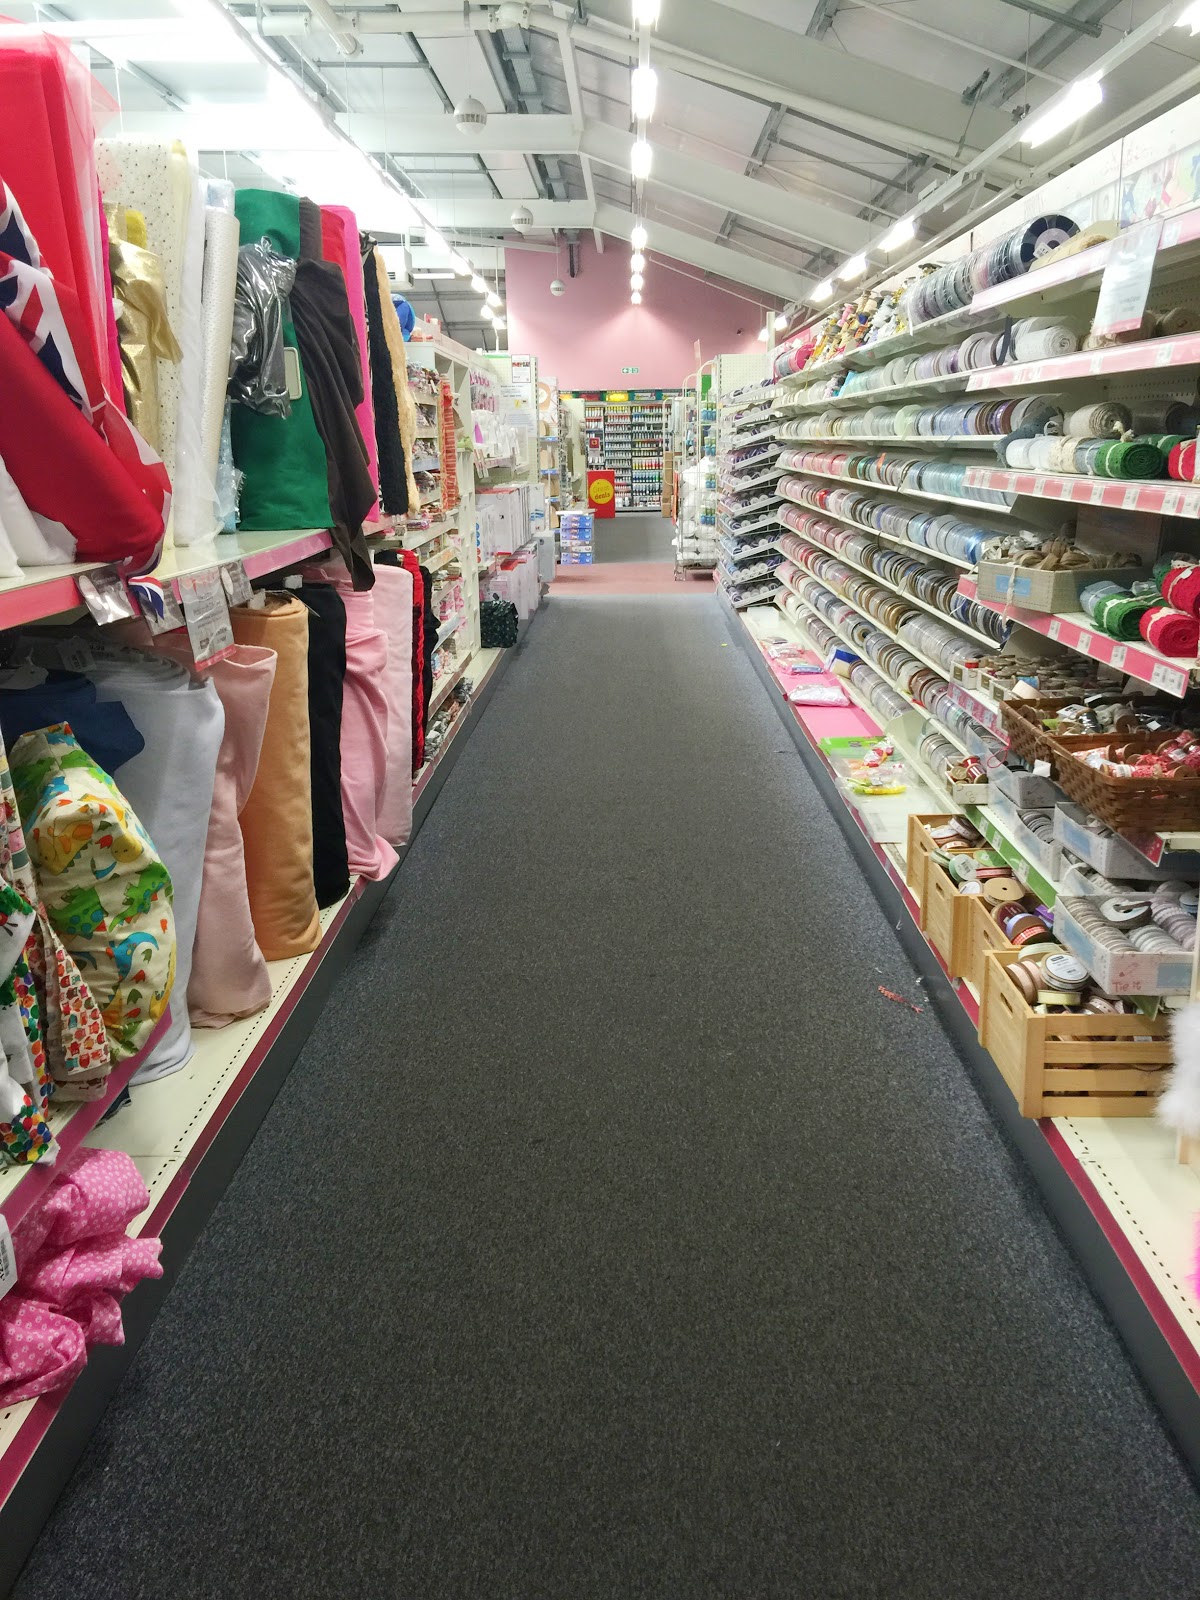 |
| The Ribbon Aisle. I’ve Spent [And Continue To Spend] Far Too Much Of My Life Here. |
Glitter Cake Bunting

Equipment:
Bamboo Skewers [99p for a large pack, local Co-Operative]
Gold Elastic, half a metre
Gold Alphabet Stickers – make sure that you have enough to create your bunting message twice
Scissors
Step by Step:
Secure gold elastic approximately 2 inches from the top of your skewer using a knot.
Trim elastic and allow cake width plus one inch length, then secure around second skewer and repeat knot.
Count letters in your message and cut out the little stickers.
Place letters along the line to calculate spacing needed.
One by one, stick letters firstly on to the front of the elastic and then the same letter onto the back – this will encase the elastic.
Dip back of sticker into glitter to stop them being sticky!
Continue until message is complete.
Our video tutorial can be found at: Glitter Cake Bunting Tutorial
Glitter Stand Alone Letters

Equipment:
White Acrylic Paint
Gold Acrylic Paint
Gold [Fine] Glitter
Cardboard letters of choice
Masking Tape
Scissors
Step by Step:
Paint letters white and leave to dry
Place masking tape in equally spaced stripes around letter
Paint first space gold and immediately sprinkle on glitter – this paint dries fast.
Repeat with each stripe
Peel off masking tape carefully
Leave to dry
You can find our video tutorial here: Stand Alone Painted Glitter Letters
Cupcake Toppers

Equipment:
Glitter Card
2 Choices of Ribbon
Lollipop Sticks or Coffee Stirrers [I got mine in a well known coffee shop or supermarket when I get my coffee, for free].
Glue or Sticky Pads
Scissors
Step by Step:
Hand cut number from glitter card and set aside
Cut 6″ ribbon from each choice and tie together in a bow around the lollipop stick
Trim ends to tidy up any frayed parts
Stick letter to lollipop stick using choice of adhesive
Leave to dry
You can find our video tutorial here: Cupcake Topper Tutorial

Tissue Paper Tassels/Balloon Tassels
Equipment:
20 Tissue Paper Sheets [5 of each colour choice]
Twine cut to length required
Scissors
Pencil
Step by Step:
Carefully separate each sheet of tissue paper and fold in half
Cut paper into 10″ widths
Cut slits [scissors or craft knife] in each piece of paper from 3 inches from the top until the bottom, with approximately 1cm spacing.
Open sheet of paper and using pencil, roll widthways to make your dual ended tassel
Remove pencil and place in the centre of the tassel – fold lengthways over the pencil and pinch to make a loop.
Twist the pencil to wind the tassel loop tightly.
Remove pencil and repeat with other sheets of paper until all are completed
Thread tassels onto twine and space as required!
You can find our video tutorial here: Tissue Paper Tassel Garlands
![IT’S HARD BEING LITTLE [GREAT LITTLE TRADING COMPANY]](https://keep-up-with-the-jones-family.com/wp-content/uploads/2015/11/gltc001.jpg)
![DIY SNOWY ADVENT CALENDAR VILLAGE [WAYFAIR FEATURE]](https://keep-up-with-the-jones-family.com/wp-content/uploads/2015/12/WAYFAIRE.jpg)
I love all of your decorations! I am always looking to save money, especially on decorations that I am only going to use once.
That party is going to be gorgeous- and all your projects look so simple to make! Thanks for sharing them!
Those came out really nice! I never would have thought they'd be so inexpensive. Great job!
How creative. These are great party decorations. Thanks for the step by step guide.
These are absolutely fantastic! You're so right, a fraction of the cost you'd pay to buy and so wonderfully creative.
I'd love to make some decorations like these. Those tassels are really cool and cupcake toppers would be a nice touch!
This is all so chic and adorable! I really love the glitter letters and cake bunting and will totally have to attempt this for my son's next birthday.
Everything looks so pretty. The directions look easy too. Can't go wrong with pretty AND easy. Will have to use some of these ideas.
I applaud you for trying to DIY with the decorations. You definitely will save some money anyway which you will be able to prove to your husband and then he will enjoy the party as well!!
I can tell this party is going to be one for the books. The decorations look so great! I am not at all talented at DIY but these make me wish I was!
These look really great! We haven't thrown a party in a while but this definitely makes me want to 🙂
I love that! We have two birthdays in July!
OMG just love everything you made!!! We have very similar taste in party decorations. I would totally make some of these things myself 😉
They were so easy! It's just finding the time when you have little ones, isn't it? 🙂 You know we would be great friends if we lived closer!!
These are totally awesome ideas and tutorials for party decorations. I love glitter and I love to craft things so this will indeed come in handy for me. Thanks so much for sharing.
DIY I've pined many projects but never actually took the time to do the projects. These seem simple enough & I love a good party.
I am a very visual person, so any step by step images always help me! What a great tutorial and who doesn't like making their own party decorations?
These are great! I never come up with ideas like this…we'll I do once I see it somewhere like here lol so thanks! I know what I'm doing for my next party!